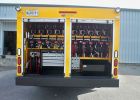
 Lube Trucks
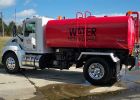 Water Trucks
 Fuel Lube Trucks
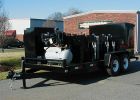 Lube Trailers
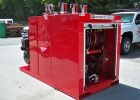 Lube Skids
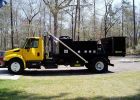 Hook Lift Package
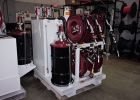 On-Demand Inventory
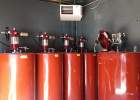 Lubrication System Installations
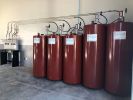 Tank Packages
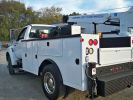 Truck Restoration
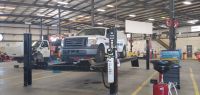 Lift Installations
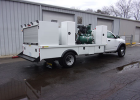 Truck Repair
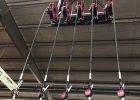 System Repairs
 Our Team
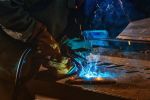 Careers
 TPL Media

Why Your Grease Pump Isn't Working
Jan 22, 2024 -- Posted by :New year, new … grease pumps? Not necessarily!
As 2024 rolls in and we all get back into our routines, it’s common to encounter equipment issues leftover from December – you know, the ones where we all said, “Eh, I’ll just handle it next year!” But now, that malfunctional grease pump is slowing – or even halting – your work day. The result is operational downtime, which can put a damper on even the best New Year’s resolutions.
When your grease pumps go down, there are 3 common issues that could be happening:
- Pump won't dispense any product at all
- Continuously blowing air from the exhaust
- Inconsistent/slow product flow (even at high PSI)
… So how do you know which one is the issue with your pump?
Our grease pump guide below can help steer you in the right direction!
BEFORE YOU BEGIN:
- • Check that you are using the correct PSI for the product and pump type
- • Ensure your air compressor motor is working properly
- • Confirm you actually have enough product in your barrel for the pump to engage
It’s also recommended to buy the manufacturer’s pre-built “repair kit” to ensure you have all necessary parts for the best results.
--------------------------------------------------------------------------------------------------------
DIAGNOSING YOUR GREASE PUMP ISSUE
For our example, we'll be using this Graco Fireball 425 50:1 grease pump, which came into our shop. The customer states that it suddenly started blowing air out of the exhaust, and then stopped pumping altogether.
STEP 1: Flush & Disassembly
Follow the manufacturer's maintenance guide to properly disassemble your specific pump. (This will include removing the priming tube and exterior pump housing, as well as the packings and gaskets.)

During this process, you will most likely be able to suspect what the underlying cause of your pump problems are.
STEP 2: Identify The Cause
There are three common culprits to pump dysfunction.
- Clogged/debris - Are there any rocks, dirt, metal shards, or even shop towel pieces lodged in the pump?
- Damaged air motor - Is the air motor functioning properly in the absence of other component damage?
- Gasket/packing damage - Are the gaskets, o-rings, or packings worn or damaged?
For the pump in our example, this is what the interior of the pump looked like after removing the pump housing cap.

As we continued disassembly, we discovered that the piston o-ring has been worn down, as compared to the manufacturer's replacement part. As this piston o-ring is vital in building pressure, its damage would cause the pump to slow the flow of product.

At this point, most techs will either (A) continue to run the pump hoping the slow flow was just an air bubble, or (B) increase the PSI hoping that increased pressure will cause it to work again. In this case, both of these actions caused the poppets to also become damaged, preventing the pump from functioning at all.

STEP 3: Clean Components & Replaced Damaged Parts
- • Use a compatible solvent (usually a multi-purpose degreaser) to remove any built-up grease/dirt/trash
- • Check additional packings and bearings for signs of wear/tear
- • Replace any parts that appear damaged or worn
STEP 4: Reassembly & Testing
Once all pump components have been thoroughly cleaned and/or replaced as needed, you can begin reassembly. Be sure to lubricate all parts (but not bolt threads) with a light, waterproof grease. The manufacturer's maintenance guide for your specific product should also include step-by-step reassembly instructions to aid in this.

Don't have the time to do this process on your own?
Our in-house repair team is always available to help! Send us a repair request here.

More Recent Posts
Why Your Grease Pump Isn't Working - A Guide
As 2024 rolls in and we all get back into our routines, it’s common to encounter equipment issues leftover from December. But now, that malfunctional grease pump is slowing – or even halting – your work day. The result is operational downtime, which can put a damper on even the best New Year’s resolutions. Our short guide to diagnosing your grease pump problems can help.
Why TPL Lube Trucks Are The Most Reliable
When you have a lube truck, skid, or system, reliability is a product characteristic that isn’t just expected – it’s non-negotiable. Your fluid exchange equipment needs to work reliably. But what does that mean? Learn three, simple ways that TPL lube trucks (and other lube equipment) are the most-reliable in the industry.
The Four Main Components You Should Be Checking: A Parts Maintenance Guide
While it may seem counterproductive to put extra time towards equipment maintenance, performing regular service on your equipment parts is vital to keep them running effectively and efficient during peak production seasons. Check out our Parts Maintenance Guide for more.
© Copyright 2023 Taylor Pump & Lift. All Rights Reserved.